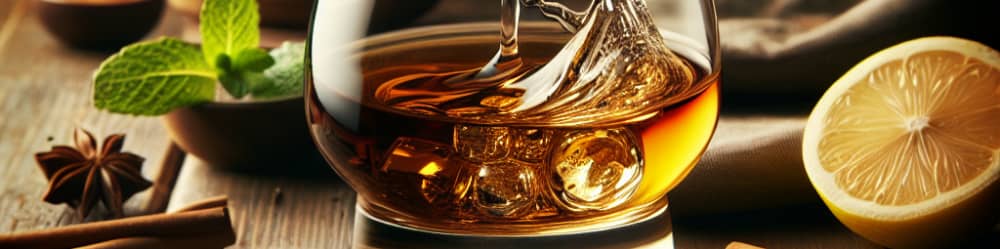

In this step-by-step guide, we’ll show you how to create your very own vodka from scratch. From the initial ingredients to the distillation process, we’ll walk you through each stage, ensuring that you have all the information you need to become a master vodka maker.
Whether you’re a beginner or have some experience in home brewing, our detailed instructions will make the process easy and enjoyable, allowing you to craft a vodka that is uniquely yours. So grab your ingredients and let’s get started on this exciting vodka-making journey!
Gathering Ingredients and Equipment
Choosing the Ingredients
When it comes to making vodka, the quality of the ingredients you choose plays a crucial role in the final product. Start by selecting high-quality grains, such as wheat, corn, or rye. Each grain brings its own unique flavor profile to the vodka, so you can experiment and find the taste that suits your preferences best.
Water Selection
Water is a key ingredient in vodka production, so it’s important to choose the right water for the job. Opt for filtered or distilled water, as it doesn’t contain impurities or unwanted flavors that could affect the taste of your vodka. Using tap water is not recommended, as it may contain chlorine or other substances that could alter the flavor.
Equipment Needed
To make your own vodka at home, you’ll need a few essential pieces of equipment. First and foremost, you’ll need a brewing or fermentation vessel to mix and store the ingredients during the process. A thermometer is also important for monitoring the temperature of the mixture. Other equipment includes a hydrometer, a grain mill, measuring tools, and a siphon for transferring liquids. Having the right equipment will ensure a smooth and efficient vodka-making process.
Preparing the Ingredients
Milling the Grains
Before you can begin the vodka-making process, the grains need to be milled. This process involves crushing the grains to expose the starch inside, which will later be converted into alcohol. You can use a grain mill to achieve the desired consistency. Make sure the grains are evenly milled without any large pieces left.
Sourcing Yeast
Yeast is an essential component in the fermentation process of vodka production. It converts the sugar in the grains into alcohol. You can choose between different types of yeast, each with its own characteristics and flavors. It’s best to select a yeast strain specifically designed for vodka production to achieve the desired taste and alcohol content.
Heating the Water
Once you have milled the grains, it’s time to heat the water. The water needs to be heated to a specific temperature to aid in the mashing and fermentation process. Use your thermometer to monitor and maintain the water at the desired temperature. Heating the water allows the enzymes in the grains to activate and break down the starches, ready for fermentation.
Mashing and Fermenting
Combining Grains and Water
With the milled grains and heated water ready, it’s time to combine them in the fermentation vessel. Slowly add the grains to the water while stirring continuously to ensure even distribution. This mixture is known as the mash and will undergo fermentation to produce alcohol. Allow the mash to cool to the appropriate temperature before proceeding to the next step.
Adding Enzymes
To enhance the fermentation process and convert the starches in the mash into fermentable sugars, you can add enzymes. These enzymes break down complex carbohydrates into simpler sugars that yeast can easily ferment. Follow the instructions provided with the enzymes to ensure the correct quantity and method of addition. This step is crucial for achieving a higher alcohol yield.
Beginning the Fermentation Process
Now it’s time to introduce the yeast to the mash. Sprinkle the yeast over the surface and gently stir it in, ensuring it is evenly distributed throughout the mixture. Place the lid on the fermentation vessel and affix an airlock to allow gases to escape during fermentation. Store the vessel in a cool, dark area and wait patiently as the yeast works its magic, converting the sugars into alcohol. The fermentation process typically takes a few days to a week, depending on the room temperature and yeast strain used.
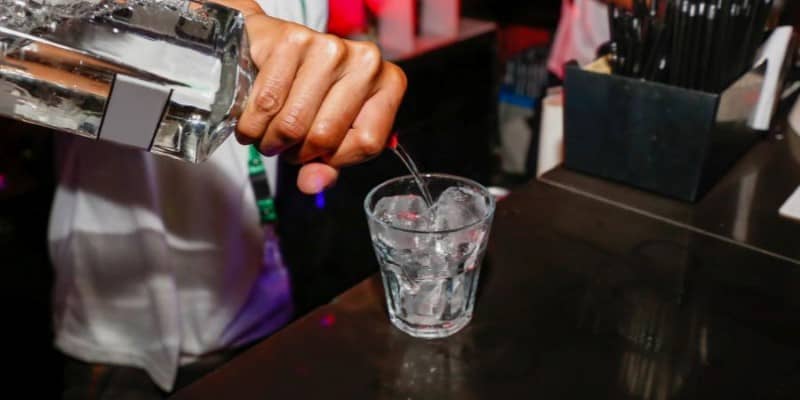
Distillation
Choosing a Still
Distillation is the process that separates alcohol from the fermented mash, giving your vodka its characteristic purity and smoothness. There are various types of stills available, including pot stills and reflux stills. Pot stills are more traditional and can produce complex flavors, while reflux stills are more efficient and suitable for higher alcohol concentrations. Consider your personal preferences and distillation goals when choosing the type of still that best suits your needs.
Setting up the Still
Once you have chosen your still, it’s time to set it up for distillation. Make sure all the components are clean and properly assembled according to the manufacturer’s instructions. Check that the cooling mechanism, whether it’s a condenser or water supply, is functioning correctly. It’s important to ensure a tight seal to prevent any vapors from escaping during the distillation process.
Heating the Solution
Before you start distilling, it’s important to heat the solution in the still. Place the fermented mash into the boiling vessel of the still, and slowly increase the heat. As the temperature rises, the alcohol will start to vaporize, separating from the other substances in the mash. The alcohol vapor will then condense and collect in a separate container, while the non-alcoholic components remain behind.
")
This image is property of images.pexels.com.
Collecting the Alcohol
Collecting the Heads
During distillation, the first part of the alcohol vapor that is collected is known as the heads. The heads contain undesirable compounds and higher alcohols that can contribute to unpleasant flavors and hangovers. It’s important to discard this initial portion to ensure the purity of your vodka. Collecting the heads involves monitoring the temperature and aroma of the distillate, as they can provide clues about when to begin collecting the hearts.
Collecting the Hearts
The hearts are the core of the distillate and the purest part of your vodka. This is the section you want to collect and retain for your final product. As the distillation process continues, the hearts will start to flow, characterized by a clean and smooth taste. Collect the hearts in a separate container, being careful not to mix them with the heads or tails.
Collecting the Tails
The tails are the final portion of the distillate and contain higher-boiling-point compounds. They may contribute to a slightly harsh taste or cloudiness in the vodka. Collect the tails separately from the hearts and heads, as you may choose to re-distill or discard them. It’s important to monitor the temperature and aroma to determine when to stop collecting the tails and finish the distillation.
Filtering and Diluting
Filtering the Alcohol
To further refine the quality of your vodka, filtering is necessary. Filter the collected distillate to remove any impurities and unwanted flavors. You can use activated charcoal filters, which effectively absorb impurities, leaving you with a cleaner and smoother vodka. Pass the distillate through the filter multiple times to ensure maximum purity.
Selecting the Filtration Method
When it comes to filtration, you have several options to choose from. You can use gravity filtration, which involves pouring the vodka slowly through the filter system. Alternatively, you can try a pressure filtration method using a filtration system specifically designed for alcohol. Gravity filtration is more common for homemade vodka, but both methods can yield excellent results.
Diluting the Vodka
After filtering, your vodka may still be too strong in terms of alcohol content. It’s common to dilute the vodka with water to achieve the desired alcohol level. Use distilled or filtered water to ensure the purity of the final product. Gradually add small amounts of water to the vodka, tasting along the way to achieve the perfect balance. Be cautious not to dilute too much, as it can affect the flavor.
Bottling and Labeling
")
This image is property of images.pexels.com.
Choosing the Bottles
When it’s time to bottle your homemade vodka, you have a range of options to consider. Choose glass bottles that are suitable for storing alcohol, preferably with tight-fitting caps or corks to maintain freshness. Consider the size of the bottles, keeping in mind your intended use and potential for gifting or sharing them with others. Select bottles that reflect your personal style and showcase your vodka professionally.
Sanitizing the Bottles
Before filling the bottles with your homemade vodka, it’s essential to sanitize them thoroughly. You can use a sanitizing solution or heat the bottles in the oven to kill any bacteria or contaminants. Ensure that the bottles are completely dry before filling them to prevent water from compromising the vodka’s quality.
Labeling the Bottles
To add a personal touch to your homemade vodka, labeling the bottles is a fun and creative step. Design your own labels using labels, tags, or even printable stickers. Include important details such as the date of production, the type of vodka, and any additional flavorings or infusions you may have used. Labeling not only adds a professional look but also helps you keep track of your batches.
Also Check: What Is Vodka Made From Exactly?
Storing and Aging
Selecting the Storage Method
After bottling your homemade vodka, it’s important to store it properly to maintain its quality over time. Keep the vodka in a cool, dark place away from direct sunlight or extreme temperature fluctuations. You can choose to store it in a cellar, a dedicated liquor cabinet, or even a refrigerator. Proper storage conditions will help preserve the flavor and integrity of your vodka.
Determining Aging Duration
While vodka doesn’t require aging like some other spirits, you may still choose to age it to enhance its flavor. Short aging periods of a few weeks to a few months can help mellow the vodka and round out any rough edges. Experiment with different aging durations and taste the vodka periodically to determine when it has reached your desired flavor profile.
Monitoring the Aging Process
Throughout the aging process, it’s important to monitor the vodka and regularly taste it to ensure it doesn’t over-age or develop off flavors. Keep a record of the aging duration and any changes you notice in the vodka’s characteristics. Adjust the aging time accordingly to achieve the best possible vodka with the flavors you desire.
Frequently Asked Questions (FAQ)
What ingredients are required to make vodka?
To make vodka, you will need grains such as wheat, corn, or rye, water, and yeast. These ingredients are essential for the fermentation and distillation processes that create vodka’s distinct flavors.
Can I use tap water for vodka production?
Using tap water is not recommended for vodka production, as it may contain chlorine or other substances that can impact the taste and quality of the final product. It’s best to use filtered or distilled water to ensure a pure and uncontaminated vodka.
How long does it take to make vodka?
The duration of the vodka-making process can vary depending on factors such as fermentation time, distillation method, and aging preferences. Generally, it can take several weeks to a few months to produce vodka from start to finish. Patience and careful monitoring are key to achieving the best results.
Conclusion
Congratulations! You have successfully learned how to make your own vodka from scratch. With the right ingredients, equipment, and techniques, you can create a vodka that suits your taste and preferences. Remember to choose quality ingredients, monitor the process carefully, and be patient throughout the different stages. Now, sit back, relax, and enjoy the satisfying and rewarding experience of sharing your homemade vodka with friends and loved ones.
Once you’ve mastered the art of making your own vodka, why not take it a step further and experiment with flavorings? You can infuse your vodka with various fruits, herbs, or spices to create unique and exciting flavor combinations. Whether it’s a citrus-infused vodka for a refreshing cocktail or a spicy pepper vodka for a bold twist, the possibilities are endless. Get creative, have fun, and let your taste buds guide you on a flavor adventure.