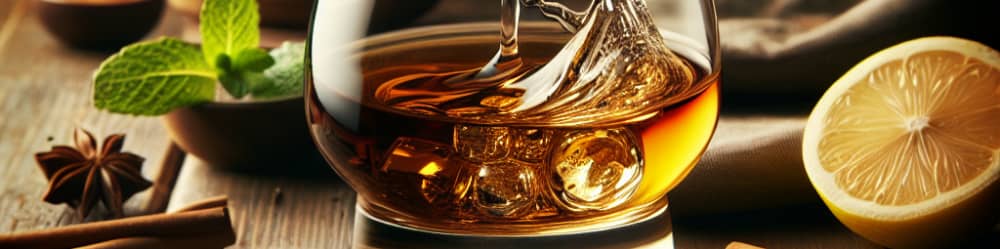

Crafting your own whiskey at home? Learn how to malt corn for whiskey in this comprehensive guide. Malted corn serves as a crucial ingredient in whiskey production, adding flavor, depth, and complexity to the final product.
In this article, we’ll walk you through the process of malting corn, providing you with the knowledge and techniques needed to embark on your whiskey-making journey. From the equipment you’ll need to the malting procedure itself, we’ve got you covered. So, grab your apron and let’s dive into the world of malted corn and whiskey crafting!
Choosing the Right Corn
When it comes to crafting whiskey at home, one of the most important steps is selecting the right corn. Understanding the different varieties of corn and their characteristics is crucial in determining the flavor profile of your whiskey.
Understanding the Different Varieties of Corn
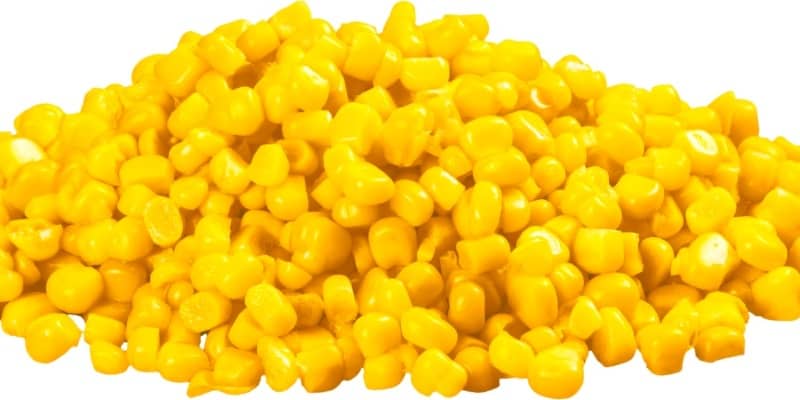
There are various types of corn available, each with its own unique properties. Dent corn, also known as field corn, is the most commonly used variety for whiskey production due to its high starch content. This type of corn has a dent at the top of each kernel, which indicates that it is rich in starch and will convert to fermentable sugars during the malting process.
On the other hand, there are flint corn and sweet corn. Flint corn has a hard outer layer and a low starch content, making it less suitable for whiskey production. Sweet corn, although delicious for eating, contains too much sugar and lacks the necessary starch for malting.
Selecting Corn with High Starch Content
When choosing corn for malting, opt for dent corn varieties such as yellow or white dent. These varieties have a higher starch content, which is essential for fermentation and alcohol production during the whiskey-making process. Look for corn that is plump, fully mature, and free from any signs of mold or damage.
Considering Organic or Non-GMO Corn
In addition to variety, you may also want to consider the sourcing of your corn. Organic and non-GMO corn can provide a more wholesome and natural foundation for your homemade whiskey. Choosing organic corn ensures that you are using corn that has been grown without the use of synthetic pesticides or genetically modified organisms (GMOs), which can give you peace of mind when it comes to the quality of your final product.
Preparing the Corn for Malting
Once you’ve selected the perfect corn for your whiskey production, it’s time to prepare it for the malting process. Properly removing the husks and silks, cleaning the corn thoroughly, and drying it to the desired moisture level are essential steps in achieving a successful malted corn.
Removing the Husks and Silks
Before you can begin malting the corn, it is necessary to remove the husks and silks. The husks are the outer layer of the corn, and the silks are the fine threads found at the top of the ear. To remove them, simply peel back the husks and gently pull off the silks. Make sure to remove any remaining debris or loose silks to ensure a clean and consistent malted corn.
Cleaning the Corn Thoroughly
After removing the husks and silks, it is important to clean the corn thoroughly. Rinse the corn under running water, gently scrubbing away any dirt or impurities. Ensure that all parts of the corn are properly cleaned, including the crevices between the kernels. This step is crucial in removing any contaminants that may affect the quality of your whiskey.
Drying the Corn to the Desired Moisture Level
Once the corn is clean, it needs to be dried to the desired moisture level for malting. Spread the corn evenly on a clean surface and allow it to air dry. The drying time may vary depending on the moisture content of the corn and the prevailing environmental conditions. Aim for a moisture level of around 14-16% for the best results.
Germination Process
Now that your corn is prepped and ready, it’s time to kickstart the germination process. By soaking the corn in water, draining and sprouting it, and carefully monitoring the germination progress, you’ll be on your way to producing malted corn for your whiskey.
Soaking the Corn in Water
To initiate the germination process, start by soaking the corn in water. Place the clean and dried corn in a container and cover it with water. Ensure that the corn is fully submerged and allow it to soak for a specific period, usually 1-2 days. Moreover, soaking softens the kernels and promotes the release of enzymes necessary for the malting process.
Draining and Sprouting the Corn
After the soaking period, drain the water from the container and spread the corn onto a flat surface. Depending on preference, you can use trays or racks with perforated bottoms to allow proper air circulation. Keep the corn in a warm, humid environment and mist it with water regularly to maintain the necessary moisture level. Within a few days, small sprouts, known as chits, will begin to emerge from the kernels, indicating that malting is underway.
Monitoring the Germination Process
During the germination process, it is crucial to monitor the progress of the sprouting corn. Check the corn daily to ensure that it is adequately moist and that the sprouts are developing evenly. Remove any moldy or overly dried corn to prevent contamination. The length of the germination process may vary depending on factors such as temperature and corn variety. Typically, malting takes around 4-6 days.
Halting the Germination
When the corn has achieved the desired level of sprouting, it is crucial to halt the germination process to preserve the enzymes and achieve the desired level of enzyme activity. This is accomplished through drying and kilning the sprouted corn.
Drying the Sprouted Corn
Once the corn has sprouted to the desired level, it needs to be dried to suspend further enzymatic activity. Spread the sprouted corn evenly on a drying surface and allow it to air dry. The drying time may vary, but typically takes around 24-48 hours. Aim for a moisture level of around 4-6% for optimal results.
Kilning the Corn to Stop Germination
After drying, the sprouted corn needs to undergo kilning, a process that involves applying heat to stop enzymatic activity completely. Place the dried corn in a kiln or an oven set at a low temperature, typically between 140-160°F (60-70°C). Keep a close eye on the corn during kilning to prevent over-drying or scorching. This step is vital in preserving the desired enzymatic activity and flavor profile of the malted corn.
Achieving the Desired Level of Enzyme Activity
The balancing act of halting germination lies in achieving the desired level of enzyme activity. By carefully controlling the drying and kilning process, you can attain the ideal enzyme activity suited for your whiskey recipe. Higher enzyme activity results in more fermentable sugars, while lower enzyme activity retains more starch for a fuller-bodied whiskey. Experimentation and fine-tuning are key to finding the perfect balance.
Crushing and Grinding the Malted Corn
Once the malted corn has been dried, kilned, and achieved the desired level of enzyme activity, it is time to prepare it for the next stage of whiskey production. This involves removing the roots from the sprouted corn, crushing it into grits or flour, and ensuring the grinding consistency aligns with your recipe.
Removing the Roots from Sprouted Corn
Before crushing and grinding the malted corn, it is important to remove the roots that have developed during the germination process. Gently pull off the roots from each kernel, ensuring that only the sprouted grain remains. This step helps eliminate any unwanted flavor or texture from the roots in the final whiskey.
Crushing the Malted Corn into Grits or Flour
To prepare the malted corn for further processing, it needs to be crushed into either grits or flour, depending on the desired consistency. Use a suitable mill or grinder to break down the malted corn into small, uniform particles. Grits yield a coarser texture, while flour provides a finer consistency. Choose the option that best aligns with your whiskey recipe.
Adjusting the Grinding Consistency as per Recipe
It is crucial to adjust the grinding consistency of the malted corn to suit your specific whiskey recipe. Finely ground corn allows for better extraction of sugars during the cooking and fermentation process, while coarser particles can contribute to a more rustic texture. Experimentation and tailoring the grinding consistency will help you achieve the desired results in your whiskey.
Cooking and Fermentation
With the malted corn prepared, the next steps involve cooking and fermentation—the key processes that convert the starches into fermentable sugars and ultimately produce alcohol.
Cooking the Malted Corn to Convert Starches
To begin the conversion of starches in the malted corn into fermentable sugars, it must be cooked. Place the crushed malted corn in a suitable vessel, such as a pot or a steam injection system, and add hot water. Maintain a temperature around 150-160°F (65-70°C) and stir the mixture continuously. The cooking process activates enzymes present in the malted corn, breaking down the starches into sugars.
Mixing the Malted Corn with Hot Water
As the malted corn cooks, gradually add hot water to the mixture to maintain the desired consistency and prevent scorching. The water helps extract the sugars from the malted corn, creating a slurry-like mixture. It is crucial to monitor the temperature and consistency throughout the cooking process to ensure proper enzymatic activity and sugar extraction.
Adding Enzymes and Yeast for Fermentation
Once the cooking process is complete, allow the cooked malted corn mixture, known as the mash, to cool to a suitable temperature for yeast activity. Add appropriate enzymes, such as alpha-amylase and glucoamylase, to further break down any remaining complex sugars into fermentable forms. Finally, introduce yeast to the mash and mix thoroughly to initiate the fermentation process, converting the sugars into alcohol.
Distillation Process
Once fermentation is complete, it’s time to move on to the distillation process. This crucial step involves using a still to separate and collect the alcohol from the fermented corn mash.
Using a Still to Distill the Corn Mash
A still is a distillation apparatus that allows for the separation of alcohol from the fermented mash. Within the still, the fermented corn mash is heated, and alcohol vapor rises, leaving behind impurities. As the vapor cools, it condenses and is collected, resulting in a purified alcohol known as distillate.
Understanding the Different Distillation Techniques
There are various distillation techniques, such as pot stills and column stills, each offering unique advantages and characteristics. Pot stills are known for producing flavorful and full-bodied spirits, while column stills are more efficient at producing high-strength, lighter spirits. Understanding the different techniques will help you choose the best approach for your whiskey goals.
Collecting the Distillate and Discarding the Heads and Tails
During distillation, it is important to collect and separate the different components of the distilled liquid. The initial distillate, known as the “heads,” contains volatile compounds that can impart undesirable flavors. The final distillate, called the “tails,” may have lower alcohol content and unwanted flavors. Discard the heads and tails, ensuring that only the heart of the distillate, with the desired purity and flavors, is retained for further maturation.
Also Check: What Is The Proper Way To Serve Absinthe Traditionally?
Maturation and Aging
After distillation, the whiskey must undergo maturation and aging to develop complex flavors and characteristics. This process involves storing the distillate in charred oak barrels, monitoring and controlling the aging process, and understanding the impact of climate on whiskey maturation.
Storing the Distillate in Charred Oak Barrels
To impart unique flavors and aromas, and facilitate maturation, the distilled whiskey is typically stored in charred oak barrels. The charred interior of the barrels interacts with the whiskey, adding complexity and depth over time. Additionally, the choice of oak, level of char, and previous use of the barrels can all influence the final flavor profile of the whiskey.
Monitoring and Controlling the Aging Process
During the aging process, it is crucial to monitor and control various factors to achieve the desired whiskey characteristics. Temperature, humidity, and air circulation all play a role in how the whiskey ages. Regular tasting and analysis help determine when the whiskey is ready for bottling, striking the perfect balance between maturity and personal preference.
Understanding the Impact of Climate on Whiskey Maturation
Climate plays a significant role in whiskey maturation, with varying temperatures and humidity levels affecting the aging process. In warmer climates, whiskey matures more quickly, intensifying flavors and accelerating extraction from the wood. Colder climates result in a slower maturation process, allowing for more subtle flavor development. Moreover, understanding the impact of climate can guide decisions regarding storing and aging your whiskey.

Source: TheTechBrain AI
Bottling and Enjoying Your Whiskey
After the aging process, it’s finally time to bottle your whiskey and savor the fruits of your labor. Properly filtering and clarifying the aged whiskey, determining the appropriate bottling proof, and enjoying your carefully crafted spirit are the final steps in creating a homemade whiskey.
Filtering and Clarifying the Aged Whiskey
To achieve a clear and polished final product, it is essential to filter and clarify the aged whiskey. To achieve this, you can use various methods, including activating carbon filters or employing fining agents. Filtering removes any impurities or sediment, resulting in a visually appealing and smooth whiskey.
Determining the Appropriate Bottling Proof
The bottling proof refers to the alcohol content at which the whiskey is bottled. Determining the appropriate bottling proof is a balance between preserving the unique flavors and aromas developed during aging and ensuring a pleasant drinking experience. Diluting the whiskey with distilled water to achieve the desired proof is often necessary.
Savoring the Fruits of Your Labor
Now comes the much-anticipated moment of savoring the whiskey you have meticulously crafted at home. Pour yourself a glass, swirl it gently, and take in the aromas before indulging in a sip. Appreciate the flavors, the complexity, and the journey that led to this moment. Share your creation with friends and family, and raise a glass to your own exceptional whiskey.
Conclusion
Crafting whiskey at home can be a rewarding and fulfilling experience. By mastering the art of malting corn, you can create a distinctive whiskey that reflects your unique flavor profile.
Experimenting with different corn varieties, techniques, and aging conditions will allow you to refine your skills and create truly exceptional homemade whiskey. So, raise a glass and cheers to the journey of creating your own delicious spirit!