
Interested in learning how to make whiskey at home? Look no further! In this comprehensive article, we will guide you through the process of distilling your own delicious whiskey right in the comfort of your own home.
From selecting the right grains to fermenting and aging your spirits, we’ll provide you with all the necessary information, tips, and tricks to help you become a master whiskey maker.
Along the way, we’ll also address frequently asked questions and provide a conclusive summary to ensure that you have all the knowledge and confidence needed to embark on this exciting journey. So, let’s get started and unlock the secrets of crafting your very own homemade whiskey!
Choosing the Ingredients
When it comes to making whiskey at home, selecting the right ingredients is of utmost importance. One of the key components in whiskey production is grains. These grains form the base of the whiskey and give it its distinct flavor. When selecting grains, you have a variety of options to choose from, including barley, corn, rye, and wheat.
Each type of grain will impart its own unique characteristics to the final product. Barley, for example, is commonly used in Scotch whiskies and lends a smooth and malty flavor. On the other hand, corn is often used in bourbon production and adds a sweet and corn-like taste. Consider experimenting with different grain combinations to create a whiskey that suits your personal preferences.
In addition to grains, selecting the right yeast is crucial for the fermentation process. Yeast plays a vital role in converting the sugars from the grains into alcohol. Different strains of yeast will produce different flavors and aromas, so choose a yeast that complements the grains you’ve selected. Whether you prefer a fruity, spicy, or more neutral flavor profile, there is a yeast out there to suit your taste.
Lastly, don’t overlook the importance of water in the whiskey-making process. The type and quality of water can have a significant impact on the final product. Some distilleries are fortunate to have access to natural water sources renowned for their purity and mineral content. If you don’t have access to such water, consider using filtered water to ensure the whiskey’s quality isn’t compromised.
A Water Intake Calculator helps you determine how much water you should consume during the process. Staying adequately hydrated ensures the best possible results and a smooth, enjoyable whiskey-making experience.
Mashing and Fermentation
Once you have chosen your ingredients, it’s time to move on to the mashing and fermentation process. This is where the magic happens and the flavors begin to develop.
Mashing the grains involves combining them with hot water in a process known as mashing in. The purpose of mashing is to convert the starches in the grains into fermentable sugars. Depending on the recipe and desired flavor profile, the grains are mashed for a specific amount of time at a specific temperature.
After the grains have been mashed, it’s time to add the yeast. The yeast will feed on the sugars and convert them into alcohol and carbon dioxide through the process of fermentation. This is where the raw whiskey starts to take shape. The duration of fermentation can vary, but typically lasts anywhere from a few days to a week, allowing the yeast to work its magic and create the desired flavors and aromas.
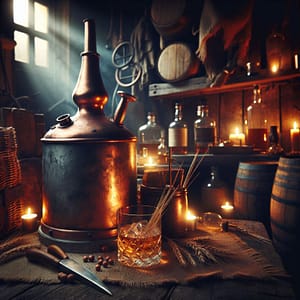
Distillation
Distillation is the next crucial step in the whiskey-making process. This is where the alcohol is separated from the other components and concentrated to create a higher proof spirit.
To set up the still, you’ll need a pot still or a column still, depending on the type of whiskey you want to make. The still is where the mashing and fermentation product is heated. As the liquid heats up, its various components vaporize at different temperatures. This separation of volatile compounds allows for the collection of a purer, higher-proof distillate.
The next step is heating the liquid in the still. This process involves carefully controlling the temperature so that the alcohol vaporizes and rises up the still, while leaving behind any unwanted impurities. It’s important to monitor the temperature closely to ensure that only the desirable compounds are collected.
Collecting the distillate is the final step in the distillation process. This involves capturing the vaporized alcohol and condensing it back into a liquid form. The collected distillate, also known as new make spirit, will have a higher alcohol content and a more concentrated flavor profile. This is the foundation for creating a high-quality whiskey.
If you’re wondering how many calories you burn while making whiskey at home, a BMR Calculator can help you estimate your Basal Metabolic Rate. Knowing your BMR can assist you in determining the right amount of energy you need during the distilling process.
Aging and Maturation
Aging and maturation is where the whiskey truly comes into its own and develops its complex flavors and smoothness. This is a patiently waited stage, as the whiskey ages in barrels over a specified period of time.
Selecting the right barrels is crucial for the aging process. The type of barrel used, such as oak, can influence the whiskey’s flavors and add depth and complexity. The barrel’s previous contents, such as bourbon or sherry, can also impart unique flavors.
After selecting the barrels, it’s time to fill them with the new make spirit. The spirit is carefully poured into the barrels and sealed to prevent any leaks or evaporation. The whiskey then begins its transformative journey as it interacts with the wood, absorbing flavors, and undergoing chemical changes.
Storage and aging are important considerations during this process. Whiskey barrels should be stored in a cool, dark place to minimize temperature fluctuations and avoid any negative impact on the aging process. Additionally, regular monitoring of the barrels and periodic sampling allows whiskey makers to gauge the maturation progress and make any necessary adjustments.
Bottling and Labeling
Once the whiskey has aged to the desired flavor profile, it’s time for bottling and labeling. This is the final step in the whiskey-making journey and involves preparing the product for consumption.
Filtering the whiskey is an essential part of the bottling process. Filtration helps remove any impurities or unwanted particles, resulting in a smoother, clearer final product. There are various methods of filtration, including using activated carbon or passing the whiskey through multiple types of filters.
Choosing the right bottles is also important. The bottle’s shape and design can influence the consumer’s perception of the whiskey. Consider selecting bottles that are both aesthetically appealing and functional, ensuring they are capable of preserving the whiskey’s quality over time.
Labeling the bottles is the finishing touch that adds a personal and professional touch to your homemade whiskey. Include essential information such as the whiskey’s name, your name as the distiller, the batch number, and any relevant details about the whiskey’s characteristics or production process. Additionally, comply with any regulatory requirements for labeling, such as alcohol content and health warnings.
Safely Storing Whiskey
After investing time, effort, and passion into making your own whiskey, it’s vital to protect and care for it during storage. Proper storage conditions can help preserve the whiskey’s quality and ensure it remains enjoyable for years to come.
Determining the right storage conditions begins with considering temperature, humidity, and airflow. Whiskey should be stored in a cool place, away from direct sunlight and extreme temperature fluctuations. Ideally, aim for a temperature between 15-20°C (59-68°F) and maintain humidity levels around 60-70%.
Another critical consideration is avoiding contamination. Whiskey is highly susceptible to absorbing flavors and aromas from its surroundings. Avoid storing whiskey near strong-smelling substances, such as cleaning products or spices, to prevent unwanted flavors from seeping into the spirit.
Protecting whiskey from light exposure is also essential. Ultraviolet rays can cause chemical reactions that degrade the whiskey’s quality and alter its flavors. Store whiskey bottles in a dark area or use tinted glass bottles to shield the liquid from harmful light exposure.
Source: TheTechBrain AI
Conducting Quality Tests
Before enjoying your homemade whiskey, it’s important to conduct quality tests to ensure it meets your desired standards. Here are some key areas to evaluate:
Checking alcohol content is crucial for a consistent and enjoyable drinking experience. Use a hydrometer to measure the whiskey’s alcohol by volume (ABV) and ensure it falls within the desired range. Adjusting the ABV can be done by adding distilled water to dilute or adding higher proof whiskey to increase the alcohol content.
Evaluating taste and aroma is a delightful aspect of whiskey appreciation. Pay attention to the whiskey’s flavor profile, identifying any desired or undesired characteristics. Assess the aroma, noting any underlying notes or complexities that contribute to the overall experience.
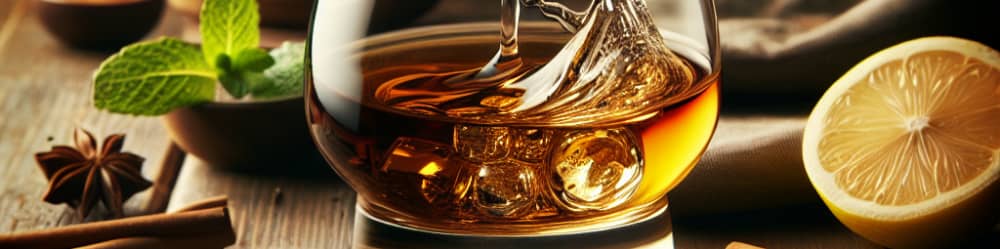
Assessing color and clarity allows you to gauge the whiskey’s maturity and quality. Observe the whiskey’s hue, clarity, and viscosity, noting any changes or developments from the aging and maturation process. A well-aged whiskey often exhibits a rich, golden color and a pleasing clarity.
Frequently Asked Questions
Can I use any type of grain for making whiskey?
While there is flexibility in the types of grains you can use to make whiskey, certain grains are more commonly used and traditional. Barley, corn, rye, and wheat are commonly used in whiskey production. Experimentation with different grain combinations can result in unique flavors and profiles.
How long does it take to make whiskey at home?
The time it takes to make whiskey at home depends on various factors, including the type of whiskey, the aging process, and personal preferences. From mashing to fermentation, distillation, aging, and bottling, the whiskey-making process can take several weeks to several years. Patience is key to allowing the whiskey to develop its desired characteristics.
How important is the water source in the whiskey-making process?
The water source used in the whiskey-making process can greatly impact the final product. Distilleries often have access to natural water sources known for their purity and mineral content. While using such water is ideal, if you don’t have access to high-quality water, using filtered water can help ensure the whiskey’s quality isn’t compromised.
Conclusion
Making whiskey at home is a rewarding and fulfilling process that allows you to create a personalized spirit that suits your taste preferences. From selecting the grains and yeast to carrying out the mashing, fermentation, distillation, aging, and bottling processes, each step contributes to the unique character of the whiskey.
Remember to invest time in selecting high-quality ingredients, such as grains and yeast, as they greatly influence the whiskey’s flavor profile. Carefully monitor the mashing, fermentation, and distillation processes to ensure optimal results. Aging and maturation are key stages that require patience and proper storage conditions.
Conducting quality tests and evaluations throughout the process will help you refine your techniques and produce whiskies that meet your desired standards. With time and practice, you can develop your skills as a master whiskey maker and create exceptional spirits that can be enjoyed by yourself and shared with friends and family.